Cover
All Aboard!
Start With The Basics
Why The Track Is So Important
How Does The Power Supply Work?
Analog
and DCC Explained
Layout Options Explained
Locomotives And Rolling Stock
What Should You Start With?
How Do You Create A Good Layout
More On Layouts and LDE
How to Create Realistic Scenery
Explain Weathering Techniques
How To Repair Problems
BONUS SECTIONS
Frequently Asked Questions
Glossary of Important Terms
Model Railroad Yard Design Explained Step-By-Step
Model Train Layout Track Plans
Garden Railroads
Mastering An Airbrush Step-By-Step
More
Model Railroad Resources

9 Tips For Creating More Realistic Scenery
1. Choose geographical area for your train to travel through and select a time period.
- Don't mix eras - putting 1970s building in a turn-of-the-century Western theme. Or putting a 1980's Honda model automobile in a fifties-era scene.
2. Hunt around for a locomotive and cars from that period and location.
3. Study the architecture of the buildings from that time period.
- A book from the library or surfing the internet will give you some ideas.
- Ask at your local model shop about buying suitable buildings.
- You may prefer to construct them yourself with balsa wood and paint.
4. Find out what kind
of shrubs and trees are likely to be found in that area. Little details
can add to the realism. Get model trees that look like native species
from your hobby shop or make them yourself.
5. Select a season of the year.
Depending on the geographical location, you might need deciduous trees
and snow in winter, colorful foliage in fall and beautiful flowers in
spring and summer.
6. Add excitement to the scene.
|
 |
Quick
Tip: |
7. Add realism.
-
Make sure any vehicles and rail crossings are from the right era. One idea is black washing the grilles and hubcaps to add depth and realism. Using a small brush you can also paint taillights, parking lights and door handles if needed. Then consider taking the cars apart and install drivers and passengers. Nothing looks more fake on a layout than vehicles seemingly driven by invisible ghosts! You can purchase miniature figures in male, female and child variations all molded in 'flesh' color. The arms must be attached by gluing. Then the figures can be painted. Sometimes, the figures won't fit between the steering wheel and the seat. It sounds a bit cruel but you simply cut the legs off with pliers and they fit just fine. Use flat (rather than glossy) model paint to make painted clothing and hair look real.
-
Keep things to the right scale relative to the trains.
-
Also remember to include figures in period dress. You can never have too many people on your layout. Put them everywhere - on streets, station platforms, walking out of shops, etc. Buy a few from different manufacturers to add variety.
- Use darker colored ballast in middle of your track. Most real railroads have ballast that is naturally darkened in the center of the track - from oil drippings. Use dark ballast around tunnel entrances, too.
-
Buy tunnel portals. They look much more realistic at a tunnel entrance than a rough-cut hole. You can 'weather' them with gray-wash, chalk, etc.
Quick
Tip: |
Quick
Tip: |
8. Cover most of the scene with greenery.
-
Slopes and inclines always seem to add interest to a scene. Vary the shades of green for your grass, bushes and trees.
-
Add roads and buildings or colored gravel.
Quick Tip:
Sawdust can be an inexpensive material for making ground cover. Buy some fabric dye from the supermarket or hobby store. Mix up the dye according to the directions and start adding your sawdust. Keep adding the sawdust until all the liquid is gone. Then put the colored sawdust in a baking dish and put in a warm oven for an hour or so to dry it out. Once it's dried and cooled, bag it up to store it until you're ready to use it. You can apply it to the ground with white glue and to trees with spray glue or hairspray.
Quick Tip:
To model weeds, hay, straw, and grass get some "binder twine" from a farmer/horse owner. The twine is a natural (unlike the new plastic stuff) material that takes paint/stain well. It also weathers naturally. Hang some outside for a year and it will look like fall weeds, let it lay on the ground and it will get a grayish color. The twine can be cut in very short lengths and used as some ground cover.
9. Add detail.
-
Blacken the insides of tunnels. Use flat black on all interior surfaces - walls, ceiling and floor. There's nothing worse than a beautiful layout with a plywood-colored tunnel interior. Tunnels should be dark and mysterious.
-
Make grade crossings look real. Use black painted balsa wood, plastic strips (or even tongue depressors) as inserts to cover the railroad ties at road crossings - giving the crossing a more authentic look.
-
Add some period advertising signage. Scan old magazine ads and resize them with a graphics program to create one-of-a-kind, realistic billboards and signage. You may also want to consider adding eye-catching animated neon signs.
The more detail the better but avoid making it too busy. Too much activity is distracting and ruins the image of your train traveling great distances. Don't leave open spaces where, in real life, there would likely be activity. Always keep in mind that you are trying to re-create a scene from history or real life. You're not just creating a mix of elements for your train to move through.
Quick
Tip: |
Landscape features like hills, valleys, small canyons, rivers, meadows, mountains and even tunnels can be constructed using a variety of materials, such as foam, plaster, Hydrocal and paper maché. White styrofoam board (also known as beadboard and polyfoam) is a popular material with many railroaders because it is easy to handle and inexpensive. A 4' x 8' sheet of 1 ½" thick sheet is a good size to work with. It is easily cut and shaped and releases no chemicals or odors when cut.
How Do You Use Styrofoam?
It's time to get artistic! Get the hacksaw and electric knife and cut the styrofoam creating a rolling shape. You can make small canyons, valleys and even shape rivers and ponds. Save the scraps and carve them into smaller bumps or rock shapes. Glue the styrofoam together with white styrofoam glue. You can also use a hot wire foam cutter. This can be a big help if you are building a large layout.
The styrofoam can then be colored with acrylic paints or sprinkled with simulated grass to add to the realism of the scene. When applying simulated grass, use a clean dry paintbrush to move the grass around. It is best to use a stippling action with the brush. Push it into all the cracks. For best results - don't skimp with the grass.
How Do You Make Rocks?
Rock outcroppings will add a lot of detail to your landscape. Take a small piece of foam and carve it into shape with a hacksaw blade or shape knife. Use acrylic paint to get the desired brown/gray color and paint the foam. While the paint is still wet add some contrast color like a light tan or light gray to the high points of the rocks. Then add a darker color such as black to the cracks. Clean your brush by dipping it in water and gently brush over the surface to blend and settle the colors into the crevices. This will add to the realism. When dry, brush on some glue and sprinkle on some grass.
Remember, rocks are not always perfect in shape, so irregular shapes may look best.
 |
You
can also buy rock molds. They are durable, flexible
and well-detailed and easy to use. Lightweight Hydrocal is used
to cast small boulders, rock outcroppings, top rocks for fields
and creeks, or entire rock faces. Plaster castings release easily
and completely. |
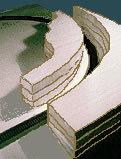
Depending on what materials you use there are different ways to build a tunnel. Here's an easy but effective method.
Make
a template of the size tunnel you want. To do this slide a piece
of paper under the track and mark it out. Cut out your template
and recheck its size. Transfer the pattern to a piece of the styrofoam
and cut it out. Unless you have really thick foam, you will need
to make at least 3 identical foam cutouts and stack them one on
top of another to get the proper height of the tunnel. Once cut,
glue and stack the three identical pieces of foam as mentioned above.
|
 |
White glue or any type of Styrofoam glue will work. If you want to secure the pieces together while the glue dries, push some long nails into the foam or use some temporary tape.
Click
The Link Below To View The |
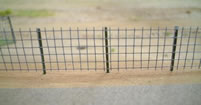
Quick
Tip: To build fences, there are lots of materials that can be used as a complement to the plastic fences you can buy in the model railroad shops. For example: wire-mesh, mosquito net, fiberglass, matches, sewing cotton and small branches from real trees. |
 |
Ponds are very easy to make when you have styrofoam as your base. The first step is to get your vacuum cleaner handy as this results in a bit of mess. Just mark out the shape you want and wire brush the foam until you get a depth of about 1/4".
Brush the pond base and surrounding area with glue. Sprinkle simulated grass carefully to the area surrounding the pond. If you spill the grass into the pond, remove as much as you can. If you leave it there it will look like a swamp.
To add the effect of water to the pond, begin by brushing brown acrylic paint from the center of the pond outward to about an inch of the shoreline. Then dilute the color a bit nearest the shore by thinning the paint. Let the brown paint dry, then put a small amount of black paint in the area where you want the water to look the deepest. Dip your brush in water and blend the edges of the black into the brown. Let dry completely.
If you want to create the effect of a still, clear pool, begin by modeling and painting the underwater landscape. Then, using a sheet of clear acetate you can simulate the water effect. You sandwich the acetate between the landscape material layers.
How Do You Model A Waterfall Or Rolling Brook?
Crumpled cling film or clear plastic wrap is an option to mimic moving water. Stringy glue can be used to simulate a waterfall. The trick is to pull the strings from the top of the falls to the bottom to simulate water falling. Using a hot glue gun is one option worth experimenting with, as the glue can be stretched out using the gun (be careful not to touch the glue to your skin as it is hot and will stick).
Dark water presents fewer problems, as it can be sculpted to shape and then painted the most appropriate color.
Another idea is to use Envirotex®, a two part epoxy-like coating used for craft projects. This is excellent for a making realistic water effect. It is available from most craft and hobby stores. Mix equal parts in a clean container and pour it into the pond. It will level itself but you can help it out with a small brush if you like. Leave it overnight to dry.
There are also several craft products available from your hobby shop to create very realistic looking water. One such product is called 'gallery glass' which used for making stained glass hobby items. It comes in several colors. The crystal clear color can be worked to create a surface that looks like moving water. Cut out a river shape from cardboard or plastic. Later on, this can be recessed into the white styrofoam base (if that is what you are using). The cardboard (or plastic) will be a good surface on which to apply the glass stain. It will also prevent the glass stain from reacting directly with the styrofoam base. A white colored base material will help bring out the colors in the stained glass paint. Start by painting over the base section with a basic blue color. Apply it thickly so that it will dry with a rippled effect.
Use toothpicks to tease in other colors like pearl white for rapids. The toothpicks can agitate the stained glass paint so that it will dry with ripple effects. The greens, silvers and blues look great too. You can also glue in rocks and tease in white around them to simulate rapids and foaming water. Remember, always test new products on a sample piece of the material, as products (like styrofoam) react differently when they come into contact with certain substances.
How Do You Model A Drainage Canal?
Streams or drainage canals often run alongside railway lines. The water effect can be achieved using a 4 inch wide strip of Acrylic Perspex. A mixture of dirty gray, black and green paint is applied to the underside of the perspex and is then set into the scenery. Perspex generally comes with a protective film of clear plastic, which could be left in place whilst you construct banks to the canal or stream.
It is important to be accurate when calculating the relative heights of the water surface and the railway line. The banks of the canal can be built up using ‘sculpted’ styrofoam covered in a combination of newspaper, white PVA wood glue and wall filler.
Quick
Tip: |
Return to top of page
Roads are usually an integral part of the scenery on any model railway. Often the roads are not modeled as well as the other scenery, and when this occurs the entire effect suffers. Yet when you know how, modeling roads is easy, fun and reasonably inexpensive. In fact, you probably already have many of the materials to model a realistic road or freeway.
The main ingredient to use is joint compound or it's sometimes called drywall mud. Get the 'lightweight' version because it works better. It has less shrinkage which results in fewer “mud” cracks when it dries. Lightweight joint compound can sometimes be hard to find at the hardware store, so you can use regular joint compound as an alternative. Because it takes longer to dry, joint compound is a better material to work with than plaster. The slower drying joint compound gives you more opportunity to form and smooth out the road before it sets hard.
You'll need some white bead-board Styrofoam (also called polyfoam) for the base surface of the road. Styrofoam is inexpensive and easy to carve out features like culverts and ditches. Using this material it is easy to make natural dips and rises just like on a real road.
Think carefully about what is the best width for your roads before marking them out or laying the road surface. When you've made your decision start masking the area. Remember that not all roads are the same. Rural roads are not usually as wide as the roads in the city. It is a good idea to position some scale vehicles alongside the roads you are building. This will help you determine the width. A two-lane road in HO scale would normally be 3 to 3.5 inches wide as a bit of a guide.
The next step is to apply the joint compound directly to the base using a trowel that is approximately as wide as the road. Spread the joint compound to a depth of ¼ to ½ inch. A light mist of water sprayed on the joint compound helps to spread and smooth the road surface. If you spread the joint compound too thick it is more likely to crack, so don’t lay it on too thick. However, you will need to make the road thick enough so that a small crown can be sanded in the road later.
It's a good idea to let the roadways/pavements dry before applying grass as the grass may stick to the road.
It is best to leave the joint compound for two to three days (depending on the thickness) while it drys out. When completely dry it should no longer feel cool to the touch, and will be ready to sand. Start with a coarse grade sandpaper (No. 60), and shape the crown. Then use a finer grade sandpaper, No.150, to sand out any rough marks left by the coarse paper.
The finishing off is usually done with No. 220 fine grade sandpaper. It is a messy so you'll need to vacuum up the dust and expose any air bubble holes, cracks and any other irregularities in the surface. The next step is to repair these with a small application of joint compound. Let it dry and then sand to a smooth finish No. 220 sandpaper.
Road colors do vary depending on what they are made of, how much they are used and the weather conditions they get exposed to. Asphalt roads tend to lighten in color as they age. Concrete roads tend to turn a bit darker with age. So, to keep it simple, duplicating an asphalt surface is the usually the easiest option. Flat latex in gray is probably your best choice, and use a darker or lighter shade to match the look you want. Floquil’s “concrete” or “aged concrete” gives a good effect. Colors tend to dry a different shade so it pays to test a small area first.
You'll then be ready to add the centerline to your road and any painted parking bays. Scale Scenics make several different styles of self-adhesive road stripes in HO scale, or check with your local hobby store if you are using a different scale. The stripes do come with a self-adhesive backing, however a light coating of spray adhesive helps them stick to the road. Take care not to peel the paint if you have to reposition the stripes. Laying the stripes in 2 foot lengths will be easiest.
Another method is to use brass stencils, available at your hobby shop, for the road markings. Hold them down with wax paper. You could use masking tape, but it is more likely to lift the paint. Spray light mists of paint, rather than one heavy coat, to prevent leakage under the stencil. If paint does lift, sand the spot gently with wet-dry No. 600 sandpaper. Then touch up the area with a fine paintbrush. Tar lines can be added using a fine black ballpoint pen, but try it out on a scrap piece of road first.
That's your road finished, or you can take it a step further. To add more realism you can weather the road to make it look like there’s been some traffic on it. Use an airbrush filled with Floquil grimy black diluted with paint thinner (1 part paint to 4 parts paint thinner.) You can also utilize the same paint to create a darker stripe down the middle of the road.
Use an airbrush to achieve subtle tonal effects. Remember, it’s easier to add more paint than to take it away if you’ve overdone it. So, go lightly on the weathering process and have fun creating a amazingly realistic road that will enhance your layout wonderfully well.
Is There A Simpler Way To Make Roads?
Yes, there is, although it's not as effective. Simply glue sandpaper to the painted baseboard. Use an extra, extra fine grit sand paper for paved or concrete roads and coarse grit sandpaper for dirt or gravel roads. Once painted, the sandpaper looks really good and does the job, although the earlier option does look best because the sandpaper doesn't contour as well as Styrofoam and paint.
Here's another quick idea to make inexpensive roads. Buy some non-skid tape (2 or 6 inch wide) which can be used for a black top road. You then use some white car detail tape for the white line down the center of the road. Result quick, inexpensive roads!
Return
to top of page
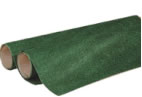
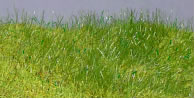
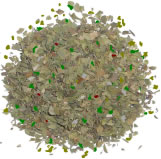
How Do You Add Grass Ground Cover?
There are all kinds of products
on the market for adding landscape colors and textures to add
realism to terrain contours. They include grass matting (pictured).
|
 |
Other methods to simulate grass include very fine, short hairlike substances, as well as foam and flock scatterings that can be sprinkled on.
The colors and effect of foam and flock scatterings vary depending on whether you are wanting to simulate ground cover textures on a forest floor, or very realistic looking grassy fields, or perhaps model tall grass on areas like shores and mountain slopes. Shop around and you'll be surprised with what is available.
When applying foams and flocks you first paint the board (or landscape)under the scattering the desired greeny color. After the paint has dried spread glue over the area you want to cover. Use a lot of glue as this stuff can easily fall off. Then spread the scatterings over the glue. It is a good idea to use a sieve to control the amount you use. A small brush can also be used to move the scatterings into all the gaps. Neither are essential but are useful. After the glued has dried use a clean dustpan and brush gently to collect all the lose scatterings so they can be re used. Don't use a vacuum cleaner because this can cause damage by pulling of a lot of the glued down material.
Another option to give an impressive 3 dimensional effect is grass blades charged with static electricity that are dropped on a flexible mat of fiber/lint or glued onto painted landscape. The grass made by German company Noch is in the form of tiny synthetic fibers, in various lengths and colors. |
 |
Quick Tip:
If you do decide to use static grass then Noch also make a simple puffer bottle to apply the static grass to white PVA woodwork glue. The grass blades become charged with static electricity and stands on end, giving that 3D effect. The little flock applicator puffer bottle helps tremendously with persuading static grass to actually stand up. |
 |
The static grass is available in a range of colors and lengths like long wild grass, short summer grass and short spring grass. It's best to experiment before starting on your layout. A good technique is to lay down some long grass, and then over lay with short grass. Any bald patches can be touched in after, and laying one layer on top of another can produce some interesting visual effects. The key is to test different techniques.
Using Surgical Lint To Create Grassed Areas
Here is a clever idea. Surgical lint can be used to achieve a realistic grass effect. Dye the lint an olive green color before laying it. The intensity of the color will vary depending on how long you leave the lint in the dye. The longer it is left in the dye the darker the lint becomes. Using dye can be messy so it pays to prepare in advance. The dye powder can make a horrible mess if it blows around, as it is highly concentrated and will permanently stain clothes and carpets. It pays to spread newspaper over counter tops and use an apron to protect clothing.
An old clean bucket will be ideal for mixing the dye powder with water. The depth and darkness of the hue can be varied depending to how long you leave the lint in the bucket of dye. Read the instructions on the packet on dye as it will guide you as to how long to leave the lint soaking. Remember, the longer the lint is left in the dye, the darker the final color tends to be after drying.
Leave the lint soaking for the required time, then remove the wet lint from the bucket. It can then be wrung out to remove excess water and dye. The lint can be spread out and hung to dry in a warm place (watch for drips that could stain). All going well, the lint should dry a grassy green color.
Applying The Grass To The Landscape
Paint the landscape shell a green grassy color before applying the lint grass. This helps to camouflage any bald patches. After the paint is dry use an old paintbrush to evenly apply a thin coating of white PVA woodwork glue. It pays to do only small sections at one time as the glue can dry reasonably quickly in warm conditions.
After spreading the glue apply the dyed lint to the glued area with the lint fibers facing downwards into the glue. The trick is to apply enough pressure to make sure that the glue spreads into every little corner without soaking up into the backing part of the lint.
Too much pressure can ruin the final effect and too little pressure can result in unsightly bald patches. So apply gentle pressure evenly.
The lint should be left to thoroughly dry overnight before carefully pulling the backing off the lint. If you do this correctly you should be left with the green fibers sticking up to closely resemble long grass. A sharp scalpel knife can be used to carefully separate the fibers from the backing if the surface of the scenery starts to lift away when removing the backing from the lint.
This method of making grass cover can look extremely effective, but even with care, a few bald patches or shiny patches can result. These can be touched up with the help if a small paintbrush or air brush. If necessary you might want to glue on some extra lint to disguise any bald patches.
Depending on the result
you may want to look at touching up other areas of the grass with shades
of green, brown or yellow paint. Again use a paintbrush or an airbrush,
but be aware that the fibers can matte down when more paint is applied.
If this happens wait until the paint is dry and then try fluffing up the
grass using an old toothbrush. The lint fibers can also be trimmed with
scissors if they are too long.
Return
to top of page
Making Natural-Looking
Trees And Shrubs
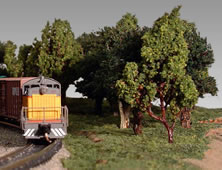
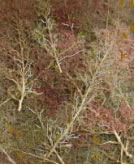
Most hobby shops will stock an interesting range of accessories including trees and lichen. Some enthusiasts even use real twigs. Trees are very easily 'planted' by poking a small hole with a nail and inserting a tree with a dab of glue. It's best to use a variety of tree sizes, types and shapes to add realism.
How can I make natural-looking trees?
Natural looking trees will add realism to any layout. You can either buy them ready-made…. or save yourself some money, apply your creative genius and make them yourself. Making trees and shrubbery is not too difficult and can be a lot of fun. Here are some different ideas:
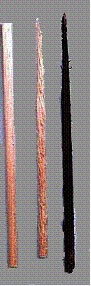
Method 1. Trees & Scrubs
To make your own trees you’ll need some 3/8 inch balsa wood dowel. It usually comes in three-foot lengths. You'll probably get two or three trees out of one length of dowel depending on the height of your trees. Simply saw the dowel to the lengths you want, then use a rasp to shape each dowel to resemble a tree trunk. Spray the trunks a matt brown color and leave to dry. To make the greenery, use artificial fern. It normally comes in packs of 10 from a craft/hobby shop or artificial flower specialist. The branches can look really good. You can paint them any color you wish, using a brush or spray can. Remember to let them dry overnight. The next thing is to cut off several of the fronds, leaving a little bit of stem on each. To add realism vary the lengths. Then arrange them according to size for easy assembly. |
 |
The next things you'll need are: some scissors, tube of glue and a drill with small drill bit. Begin at the top of the trunk and drill a hole through the dowel. Then insert the stem of one of the small fern branches into the hole with a dab of glue.
You then turn the trunk (a quarter turn should be enough). Then drill another hole about a quarter of an inch lower and glue in another fern branch.
Continue this process down the trunk, gradually making the branches longer as you make your way down the truck of the tree. For 3 or 4 turns do the same size, and then increase it to the next size for another 3 or 4 turns… and so on.
You can then spray the tree with hairspray (use a cheap brand) followed by a sprinkle of woodland scenics ground cover at the base. When using hairspray use only a light coating. Any more will cause an ugly 'frosting' effect that spoils your work, so be careful.
Using the same dowel and glue method you can use other dried floral materials such as baby’s breath. To mimic a deciduous tree in autumn spray the tree a golden brown color, and then add some Heki Flor to give it an individual character.
| Quick
Tip: If you are modeling conifers or other large trees here's what to do. Take your longest passenger car, turn it up on end, and make the trees taller, up to half again as tall.
|
Quick
Tip: |
Method 2. Trees & Scrubs
Conifers always look good. So here is another method you could try, this time making conifers:
Start by splitting cedar shake shingles into 1/4 to 1/2 in wide pieces lengthwise (with the grain). Use a belt sander with a coarse grit belt to rough them out round and taper them to a point. Be careful because this can be a bit fiddly. Leave some grooves in them to mimic the bark texture.
Get a 'cut to fit' reusable (washable) furnace filter (sometimes called a "horsehair" filter) – it is very coarse with no cardboard frame. Then cut it into several different size squares, ranging from about 5 inches square to 1 inch square. Trim them to rough circles. Pull them apart (make them thicker and less dense) and spear them on the cedar shake trunks in from large to small sizes.
Spray the branches heavily with the hairspray and sprinkle liberally with extra-fine ground foam ground cover (dark green). Woodland Scenics fine turf is ideal and comes in a suitable color called 'weeds'. Hang the trees upside down and plant them when dry.
Quick
Tip: |
Method 3. Trees & Scrubs
Here's another method you might want to try. Get some wire, preferably steel, but copper strands from electrical leads will do. Start by cutting 12 to 18 lengths of wire 4 to 6 inches long. You then twist the wires into a basic tree shape (trunk and branches). The next thing is to apply some glue on the trunk and the base of the branches.
Get some thick cotton thread (not a bright color). Wind the cotton thread around the trunks when the glue is still wet. Wait overnight for the glue to dry. Then paint the branches (including the ends of the branches) and trunk.
Leave this to dry. Put some glue on the trunk and stick brown 'turf' or ground bark to the trunk. Leave to dry again (approx 24 hours). Use Woodland Scenics foliage for the leaves. Finish with a light misting of hairspray.
Make your trees in batches of 5 to 10 trees at a time. This batch size is large enough to make several trees at once without getting bored with repetition.
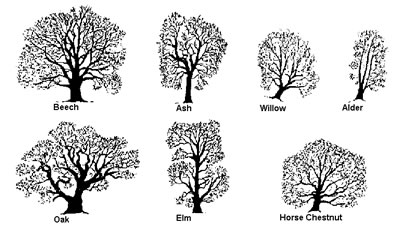
Make
Realistic Trees Using These Tree Profiles |
 |
Method 4. Trees & Scrubs
A plant know as "Sea Foam" has great potential to make delicate, realistic looking trees. Depending on where you live it could be sold under a variety of different names. I've even heard it called ‘forest in a box’. Ask at model railroad shops and hobby suppliers.
Sea Foam on its own looks like small scale trees, but looks a little artificial and boring without some work. It tends to come slightly curved, so some manipulation will be required to get a proper tree shape. Try assembling a tree from various sprigs of Sea Foam rather than using just one piece. Use a larger piece as the main trunk and to which you will add sprigs for branches. |
 |
When joining pieces of Sea Foam together, you may need to strengthen the joints with fine brass wire. To add a greater girth to the bottom of the trunk wind a few pieces of irregularly torn masking tape around the trunk and seal it in with a mixture of wall filler and white glue.
When you've finished creating the basic tree skeleton, give it a quick spray with a dark greeny-grey/brown color aerosol paint. When the paint has completely dried, the foliage can be added by spraying the skeleton with spray adhesive or hairspray. The skeleton can then be dipped into fine ground scenic foam of the color of your choice. Alternatively you can apply foliage matting (like from Woodland Scenics) to the tree skeleton.
Another low cost idea is to use dried kitchen herbs for creating scale leaves. Different herbs and combinations of herbs create different effects. Dried herbs like Oregano, Thyme, and Parsley can be easily glued to the Sea Foam branches with spray adhesive. Put some old newspapers under the branches when you sprinkle the herbs over the tree foam. This way you can catch any herbs that don't stick and reuse them on other branches. |
 |
After giving the tree skeletons a thorough coating of the herbs give them a coat of matt Varnish. The matt varnish will help seal the herbs and remove the stickiness of the spray adhesive. The trees can then be left overnight to dry.
After the trees are fully dry, some modelers then like to apply a coating of a white PVA wood glue/water mix by using a spray bottle. This can be done by hanging the trees upside down on some string and again left to dry over night.
If possible, plant the
trees on the layout permanently. A couple of suggestions:
1. Use a small length of brass rod
(1mm would do) which is glued into the base of the trunk and a small hole
pre-drilled in the ground.
2. Or you could simply drill a small hole in the baseboard and then fill it with glue. The trees can then be inserted and the glue left to dry.
Note: Although Sea Foam
is reasonably delicate, it is strengthened by the various coatings that
are applied. The trees should be sufficiently flexible to withstand the
odd brush with a careless hand or wrist. Also note, that some dried herbs
can go brown over time, so you may want to add some green paint to the
trees.
Return
to top of page
Method 5. Trees & Scrubs
The most inexpensive idea of all is to search your garden for twigs and other things to use to make trees and shrubs. Little twigs are great for this (Ones that are not green on the inside). Cut them up into little pieces and make cordwood, or logs or fire wood for your not so obvious scenes. These twigs should be coated with a clear wood preservative, found in any hardware store. Simply drill a hole in the board and glue in the tree.
You can make a thousand or so trees for next to no cost when you consider common weeds and plants as the source. Things like: sedum, yarrow, oregano, snakeweed, ragweed and other plants.
Quick
Tip: |
Click
The Link Below To View The http://www.model-railroad-resources.com/members-trees4th.html |
Everyone has different ideas when it comes to positioning trees on a layout. Some modelers prefer to model the scene to authentically represent the prototype railroad. For example; fire was a potential danger in the steam era.
Trees and other vegetation were often cleared from alongside tracks to prevent fires being caused by the burning embers from the chimneys of steam locomotives. Sparks from the tracks were also a problem explaining why leaves were sometimes cleared away. This was especially the case near stations as leaves could make it impossible for a locomotive to pull away after taking on passengers.
Nowadays the proximity of large trees to overhead power lines has replaced the problem of burning embers.
Storms can also create havoc and necessitate the clearing of trees and vegetation alongside track. Trees get blown over in stormy conditions blocking the track bring down power cables. Tree branches can also trip out the power lines resulting in them having to be reset.
So, it is over to you
whether you want to take these kind factors into consideration when positioning
trees on your layout. You may prefer to do what a lot of modelers do,
and simple position trees and vegetation where they will look best.
Return
to top of page
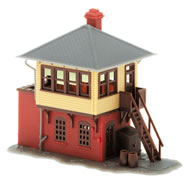
It's usually easiest to buy kitset buildings from a hobby shop, unless you want to build your own. There are numerous kits you can assemble; the easiest ones are the snap-together plastic models. Apply thin washes of acrylic paint to these buildings to give them an interesting patina of age and weathering. This will add to the realism of the scene. Use an up-down motion to simulate the way nature would do it.
| Quick
Tip: |
Buildings can say as much about the scene you're modeling as the trains. So, it is important to select buildings that match the era and geography of the theme. For instance; the architecture of buildings in New Mexico would look very different from those in the coastal Carolinas or in the Dakotas. Wood is the preferred choice for construction in the Eastern and Northern areas of the USA, whereas in the desert Southwest, stone, clay and concrete are common construction materials.
Non-modelers often pick up the clues given by buildings and structures, even though they know nothing about the railroad elements. So don't get caught out!
Quick Tip:
Shiny surfaces can spoil the realism of any model train layout. Shiny surfaces can make model buildings and model trains look fake as though they have just come off a shop shelf. A simple way to remove that shine is to over-spray the structure or rolling stock with Dullcote (Testors #1260 clear flat lacquer overcoat). Dullcote is available at most hobby stores and comes in a small spray can like many other model car colors.
Are The Roofs Important?
YES! Roofs are a visible part of model railroad structures, so it's important to pay attention to them. Roof pitch and overhang seems to differ significantly from one region of the country to another. For instance, buildings in the 'snowbelt' have steeper roof pitches as a rule to help shed the snow, while buildings in warmer regions tend to have a shallower pitch to the roof. Also, the type of roofing material used tends to vary, depending on the region and the value of the building.
Quick Tip:
An easy way to make windows on buildings. Look for some clear plastic packaging strips and cut them to fit a window. Place two drops of glue above the window and place the window on top. Let Dry. Then you can put masking tape or colored paper partly on the plastic to make blinds! It is an asy and inexpensive way to make windows.
What
About Other Accessories?
You can add all sorts of
accessories to your layout, but don't get too carried away. The whole
purpose of accessories is to add realism. Automobiles and figures can
enhance a layout, but they need to be from the same era and of the same
scale if you are after realism.
| Quick
Tip: For example, tea leaves, saw dust and even cardboard tubes. Try crushing an old brick into small pieces and scatter the pieces around to look like small rocks. Those styrofoam meat trays you throw away can be carved to make realistic cliffs and walls. And, even though you will need to buy things, you don't need to buy everything at once. You'll get more enjoyment when your railroad is a developing work-in-progress. |
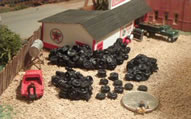
| Quick
Tip: Another idea
is to use kitty litter as carloads for gondolas and hoppers. You
can mix it with watered-down white glue. Try to shape it into
little piles for more realism. You can also paint it black to
represent coal. Kitty litter can be a bit rough to use, however
it is economical and worth a try depending on what you want to
create. |
Attention to detail is
important when creating an accurate reconstruction. Keep good records
and create an effective plan in the building of your model railroad. Include
information on why the original full-sized railroad was built. Keep records
on the type of customer it served, or materials that were hauled, or the
passenger fares charged etc. This all adds to the enjoyment of your hobby
when you aim to recreate a particular railroad in a particular era. In
a way, you almost become a time traveler … and it is a great talking
point with visitors.
Return
to top of page
© 2006 Robert
Anderson, Market Leaders Ebooks, all
rights reserved